i-ACTIVSENSE


360° View Monitor (Mazda Connect (Type B)) (Some Models)
How to Use the System
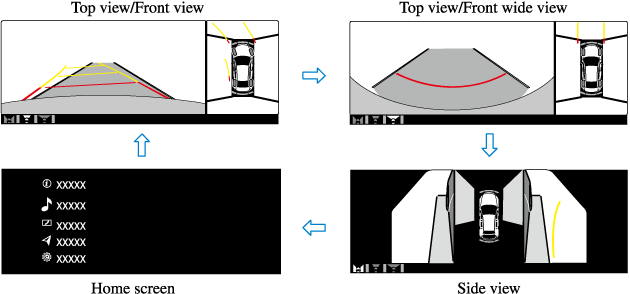
Top view/Front view, Top view/Front wide view, Side view
Indication
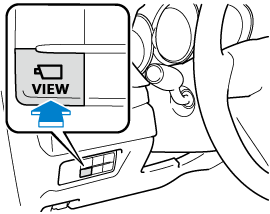
Images are displayed on the screen when the 360°View Monitor switch is pressed with all of the following conditions met.
-
The ignition is switched ON.
-
The selector lever is in a position other than R.
Display switching
The displayed screen can be changed each time the 360°view monitor switch is pressed.
-
When the selector lever is in R position, the displayed screen does not switch to the top view/front view, top view/front wide view, or the side view.
-
Display of the top view/front view, top view/front wide view, or the side view stops even with the display conditions met if any of the following conditions occurs.
-
When a switch around the commander knob is pressed.
-
The selector lever is shifted to P position (displayed when the selector lever is in a position other than P).
-
(Displayed when vehicle speed is less than 15 km/h (9.3 mph))
-
4 minutes and 30 seconds have passed.
-
The vehicle speed is about 15 km/h (9.3 mph) or faster.
-
-
(Displayed when the vehicle speed is about 15 km/h (9.3 mph) or faster)
-
The vehicle speed is about 15 km/h (9.3 mph) or faster after 8 seconds have passed since pressing the 360°View Monitor switch.
-
Four minutes and 22 seconds have passed from the point when the vehicle speed was less than 15 km/h (9.3 mph) after 8 seconds have passed since pressing the 360°View Monitor switch.
-
-
-
The 360°View Monitor settings can be changed as follows.
Refer to the Settings section in the Mazda Connect Owner's Manual.
-
Automatic display of the 360°View Monitor when the ultrasonic senor detects an obstruction.
-
Automatic display of the 360°View Monitor when the ignition is switched ON.
-
Screen priority level when the system launches.
-


Top view/Rear view, Top view/Rear wide view
The top view/rear view, top view/rear wide view displays when all of the following conditions are met.
-
The ignition is switched ON.
-
Selector lever is in R position.
Display switching
The displayed screen can be changed each time the 360°view monitor switch is pressed.

-
The top view/rear view and top view/rear wide view automatically display whether or not the 360°View Monitor switch is turned on or off when shifting the selector lever to R position.
-
The top view/rear view and top view/rear wide view displays the previously displayed screen.
-
The setting can be changed to display the top view/front view when shifting from reverse to a forward gear without operating the 360°View Monitor switch to check the front of the vehicle while parallel parking.
Refer to the Settings section in the Mazda Connect Owner's Manual.
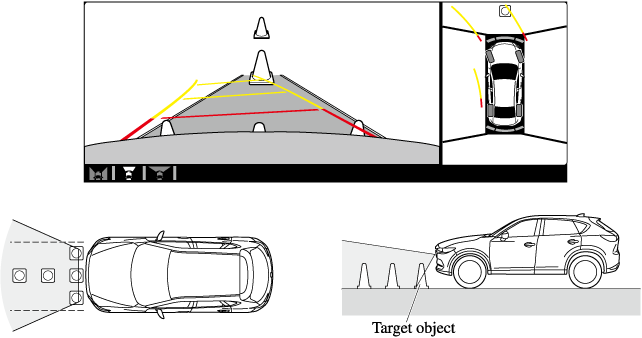
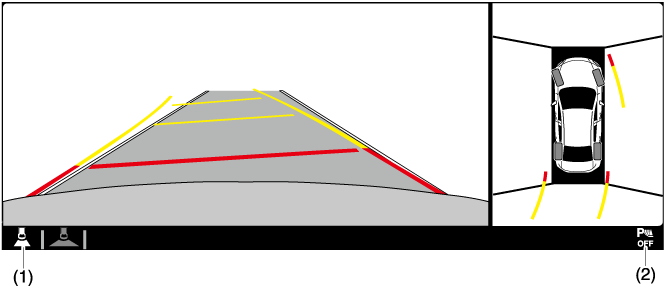
Screen operation/icon
Always stop the vehicle when adjusting the 360°View Monitor image quality.
Do not adjust the 360°View Monitor image quality while driving. If you adjust the 360°View Monitor image quality (such as brightness, contrast, tone, and color density) while driving, it could lead to an unexpected accident.
|
Display/Icon |
Content |
|
|---|---|---|
|
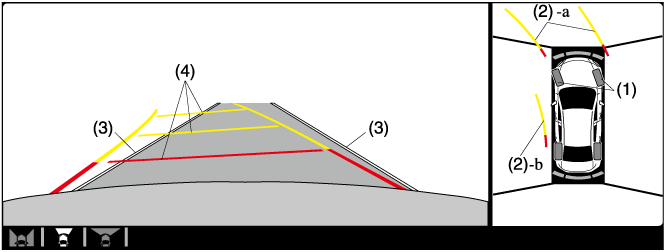
(1) |
View status icon |
Indicates which image is displayed among the front view/front wide view/side view/rear view/rear wide view. |
|
(2) |
Parking sensor status icon |
Indicates that the parking sensor has a problem or it is switched off. |