


Audio Set


Touch panel operation
Do not press the screen strongly or press it with a sharp-pointed object. Otherwise, the screen could be damaged.


For safety reasons, operation of the center display is disabled while the vehicle is being driven. However, items not displayed in gray can be operated using the commander switch while the vehicle is being driven.

Touch & Tap
-
Touch or tap on the item indicated on the screen.
-
The operation is launched and the next item is displayed.

Slide (USB audio only)
-
Touch the setting item displaying a slider bar.
-
Touch the slider with your finger and move to the desired level.

Swipe
-
Touch the screen with your finger and move up or down.
-
Items which were not displayed can be displayed.

Return to previous screen
-
Touch the
 .
.
Displaying the home screen
-
Touch the
 .
.
Home screen

|
Icon |
Function |
|---|---|
 |
Applications Information such as average fuel economy, maintenance, and warnings can be verified. Depending on the grade and specification, the screen display may differ. |
 |
Entertainment Operates audio such as the radio. The audio source most recently used is displayed. An audio source which cannot be used at that time is skipped and the previous audio source is displayed. To change the audio source, select the |
 |
Communication Bluetooth® related functions are available. |
 |
Navigation Navigation screen is displayed (vehicles with navigation system). If the SD card for the navigation system is not inserted, the compass indicating the direction in which the vehicle is moving is displayed. The compass may not indicate the correct bearing when the vehicle is stopped or traveling at a slow speed. |
 |
Settings Overall setting menu (Such as display, sound, Bluetooth® and Language). Depending on the grade and specification, the screen display may differ. |
 icon displayed at the bottom of the screen.
Volume/Display/Sound Controls
What is satellite radio?
SiriusXM® All Access Subscription.

Hopefully, you're already loving SiriusXM in your new Mazda. But don't stop there — you can also listen on the app and online. All Access is the very best subscription package – with the most channels and the most flexibility. With All Access, you get every channel available on satellite radio, plus you can listen on the app and online — so you can enjoy SiriusXM wherever you are. Here's what's included:
-Over 150 satellite channels to enjoy in your car, coast-to-coast, 24/7.
-All kinds of commercial-free music, plus every major sport, world-class news and the biggest names in talk & entertainment.
-All of our premium programming, including Howard Stern, every NFL, MLB®, and NBA game, NHL® games, every NASCAR® race, 24/7 talk channels dedicated to the biggest leagues, and much more.
All SiriusXM services require a subscription, sold separately or as a package by SiriusXM Radio Inc. (or, in Canada, SiriusXM Canada Inc.), after any trial subscription which may be included with your vehicle purchase or lease. To subscribe after your trial subscription, call 1-877-447-0011 (U.S.A.) or 1-877-438-9677 (Canada).
It is prohibited to copy, decompile, disassemble, reverse engineer, hack, manipulate, or otherwise make available any technology or software incorporated in receivers compatible with the SiriusXM satellite radio service or that support the SiriusXM website, the online service or any of its content. Furthermore, the AMBE® voice compression software included in this product is protected by intellectual property rights including patent rights, copyrights, and trade secrets of Digital Voice Systems, Inc. The SiriusXM Service may include traffic, weather and other content and emergency alert information and data. Such information and data is not for “safety for life”, but is merely supplemental and advisory in nature and, therefore, cannot be relied upon as safety critical. Neither SiriusXM nor Mazda is responsible for any errors in accuracies in the SiriusXM data services or its use in applications. The SiriusXM content is subject to change without notice.
Displaying the Radio ID
When channel 0 is selected, the radio ID is displayed. Use the PREVIOUS or NEXT channel buttons to select channel 0.
SiriusXM® operation
Select the  icon on the home screen to display the Entertainment screen. When
  is selected, the following icons are indicated in the bottom part of the center display.
|
Icon |
Function |
|---|---|
 |
Displays the Entertainment menu. Use to switch to a different audio source. |
 |
Displays the channel list of the current category. |
 |
Displays the favorites list. Long-press to store the channel currently being aired. Refer to Operating the Radio (Search). |
 |
Plays each channel in the current channel list for 6 seconds. Select again to continue receiving the channel. The function can be selected when the Tune Scan™ setting is turned off. |
 |
Each channel programmed to Smart Favorite is played for 6 seconds. The function can be selected when all of the following conditions are met.
|
 |
Displays in red while a station in a TuneMix™ channel is being broadcast. The TuneMix™ broadcast ends when the icon is pressed. |
 |
(During TuneMix™ broadcast/Tune Scan™ operation) Returns to the beginning of the previous song. |
 |
Plays a radio. When selected again, playback is temporarily stopped. |
 |
(During TuneMix™ broadcast/Tune Scan™ operation) Advances to the beginning of the next song. |
 |
(When in a mode other than TuneMix™/Tune Scan™) Plays the previous channel. |
 |
(When in a mode other than TuneMix™/Tune Scan™) Plays the next channel. |
 |
Displays the setting screen. |
 |
Displays sound settings to adjust audio quality level. Refer to Volume/Display/Sound Controls (Search). |
Selection from channel list
Receivable channels can be displayed on the channel list screen. You can easily select the channel you want to listen from the list. Each category can be also displayed.
-
Select the
 icon to display the channel list.
 -
Select a desired channel.
(Select from category list)
-
Select the
icon to display the channel list. -
Select
 to display the category list.
 -
Select a desired category.
Creating TuneMix™ Channel
The music channels programmed to Smart Favorite can be programmed to the TuneMix™ Channel.
-
Smart Favorite can be programmed by selecting
 on the SiriusXM Settings screen.
 -
The TuneMix™ Channel cannot be created unless two or more SiriusXM music channels have been programmed to Smart Favorite.
-
Select the
icon to display the channel list. -
Select the
 tab.
tab. -
Select
 .
. -
Select
 .
. -
Select the desired music channel to the TuneMix™ Channel.
-
Select
to register the TuneMix™ Channel.
How to use SiriusXM Travel Link®
SiriusXM Travel Link®
Properly equipped Mazda vehicles will also get the following SiriusXM infotainment services : Traffic, Weather, Sports Scores, Fuel Prices, and more. For a list of available features in your vehicle, visit SiriusXM.com/infotainment and get the most out of your driving experience.
Switching to SiriusXM Travel Link®
-
Select
 on the home screen to display the Applications screen.
 -
Select
 .
. -
Select the item you want to display.
|
Item |
Function |
|---|---|
|
Traffic Plus*1 |
Displays continuously updated traffic information on the navigation screen in real time. |
|
Weather Forecast |
Displays the weather forecast. |
|
Weather Radar*1 |
Displays items such as weather radar, severe storms, and hurricane/tropical storm information on the navigation screen. |
|
Weather Alerts |
Displays weather information, warnings, and security alerts. |
|
Fuel Prices |
Displays information for fuel stations near your vehicle's current position. |
|
Sports |
Displays a list of each genre list and the game schedules and match results for teams selected from the list. |
-
With Car navigation system
How to use AUX mode
Playback
-
Select the
icon on the home screen to display the Entertainment screen. -
Select
 to switch to the AUX mode. The following icons are displayed in the lower part of the center display.
|
Icon |
Function |
|---|---|
|
Displays the Entertainment menu. Use to switch to a different audio source. |
|
Displays sound settings to adjust audio quality level. Refer to Volume/Display/Sound Controls (Search). |
-
If a device is not connected to the auxiliary jack, the mode does not switch to the AUX mode.
-
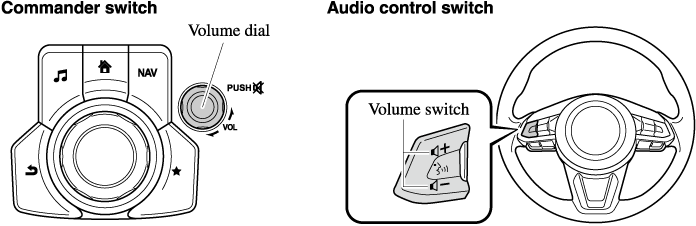
Adjust the audio volume using the portable audio device, commander switch, or audio control switch.
-
Audio adjustments can also be made using the portable audio device's volume setting.
-
If the connection plug is pulled out from the auxiliary jack while in AUX mode, noise may occur.
How to use USB mode
|
Type |
Playable data |
|---|---|
|
USB mode |
MP3/WMA/AAC/OGG file |
This unit does not support a USB 3.0 device. In addition, other devices may not be supported depending on the model or OS version.
The recommended capacity of the USB memory is 16 GB or less.
USB devices formatted to FAT32 are supported (USB devices formatted to other formats such as NTFS are not supported).
Playback
 or
or  to switch the USB mode. The following icons are displayed in the lower part of the center display.


 .
. .
. .
.Gracenote® Database
When a USB device is connected to this unit and the audio is played, the album name, artist name, genre and title information are automatically displayed if there is a match in the vehicle's database compilation to the music being played. The information stored in this device uses database information in the Gracenote® music recognition service.
For information related to the most recent Gracenote® database which can be used and how to install it, go to the Mazda Hands Free Website:
Introduction
Gracenote, the Gracenote logo and logotype are either a registered trademark or a trademark of Gracenote, Inc. in the United States and/or other countries.

Gracenote® End User License Agreement
This application or device contains software from Gracenote, Inc. of Emeryville, California (“Gracenote”). The software from Gracenote (the “Gracenote Software”) enables this application to perform disc and/or file identification and obtain music-related information, including name, artist, track, and title information (“Gracenote Data”) from online servers or embedded databases (collectively, “Gracenote Servers”) and to perform other functions. You may use Gracenote Data only by means of the intended End-User functions of this application or device.
You agree that you will use Gracenote Data, the Gracenote Software, and Gracenote Servers for your own personal non-commercial use only. You agree not to assign, copy, transfer or transmit the Gracenote Software or any Gracenote Data to any third party. YOU AGREE NOT TO USE OR EXPLOIT GRACENOTE DATA, THE GRACENOTE SOFTWARE, OR GRACENOTE SERVERS, EXCEPT AS EXPRESSLY PERMITTED HEREIN.
You agree that your non-exclusive license to use the Gracenote Data, the Gracenote Software, and Gracenote Servers will terminate if you violate these restrictions. If your license terminates, you agree to cease any and all use of the Gracenote Data, the Gracenote Software, and Gracenote Servers. Gracenote reserves all rights in Gracenote Data, the Gracenote Software, and the Gracenote Servers, including all ownership rights. Under no circumstances will Gracenote become liable for any payment to you for any information that you provide. You agree that Gracenote, Inc. may enforce its rights under this Agreement against you directly in its own name.
The Gracenote service uses a unique identifier to track queries for statistical purposes. The purpose of a randomly assigned numeric identifier is to allow the Gracenote service to count queries without knowing anything about who you are. For more information, see the web page for the Gracenote Privacy Policy for the Gracenote service.
The Gracenote Software and each item of Gracenote Data are licensed to you “AS IS.”
Gracenote makes no representations or warranties, express or implied, regarding the accuracy of any Gracenote Data from in the Gracenote Servers. Gracenote reserves the right to delete data from the Gracenote Servers or to change data categories for any cause that Gracenote deems sufficient. No warranty is made that the Gracenote Software or Gracenote Servers are error-free or that functioning of Gracenote Software or Gracenote Servers will be uninterrupted. Gracenote is not obligated to provide you with new enhanced or additional data types or categories that Gracenote may provide in the future and is free to discontinue its services at any time.
GRACENOTE DISCLAIMS ALL WARRANTIES EXPRESS OR IMPLIED, INCLUDING, BUT NOT LIMITED TO, IMPLIED WARRANTIES OF MERCHANTABILITY, FITNESS FOR A PARTICULAR PURPOSE, TITLE, AND NON-INFRINGEMENT. GRACENOTE DOES NOT WARRANT THE RESULTS THAT WILL BE OBTAINED BY YOUR USE OF THE GRACENOTE SOFTWARE OR ANY GRACENOTE SERVER. IN NO CASE WILL GRACENOTE BE LIABLE FOR ANY CONSEQUENTIAL OR INCIDENTAL DAMAGES OR FOR ANY LOST PROFITS OR LOST REVENUES.
© Gracenote, Inc. 2009
Updating the database
The Gracenote® media database can be updated using USB device.
-
Connect a USB device containing the software for updating Gracenote®.
-
Select the
 icon on the home screen to display the Settings screen.
 -
Select the
 tab and select
  .
. -
Select
 . The list of the update package stored in the USB device and the version are displayed.
 -
Select the package to use the update.
-
Select
 .
.
How to use Apple CarPlay™ (Some Models)
Switching to Apple CarPlay™
Connect the iPhone® by inserting the Apple®-genuine connector cord to the USB terminal indicated by the  mark.
mark.
Refer to How to connect USB port/Auxiliary jack (Search).
-
When you switch your iPhone® connection from Bluetooth® to the vehicle's USB terminal, the system switches to Apple CarPlay™. The applications which was being used via Bluetooth® connection can be used continuously. However, the available functions of the applications using Bluetooth® connection and those on Apple CarPlay™ may differ.
-
If the iPhone® is connected to the USB terminal not indicated by the
mark, the system operates in USB mode.
Display of Apple CarPlay™ Screen
Use any of the following methods to display the Apple CarPlay™ screen in the center display.
-
Select
 on the home screen.
 -
Long press
on the commander switch. -
Select
on the home screen, and select  from the Applications screen.
Apple CarPlay™ home screen

The icons and icon positions displayed on the Apple CarPlay™ home screen may differ depending on the connected iPhone® and iOS version.
|
No. |
Icon |
Explanation |
|---|---|---|
 |
Icon for connected iPhone® |
Launches the Apple CarPlay™ application. Refer to the help information available with each application for the method of using each application. |
 |
 |
Switches to the Mazda Connect home screen. |
 |
 |
Displays the Apple CarPlay™ home screen. |
Convenient Ways to Use Apple CarPlay™
|
Item |
Operation method |
|---|---|
|
Activating the voice recognition function (Siri®)*1 |
Activate Siri® using any of the following two methods to operate Apple CarPlay™ by voice.
|
|
To display the Now Playing screen |
When music is playing in Apple CarPlay™ and a screen other than the Now Playing screen is being displayed, press |
|
To display the MAP screen |
When using map route guidance in Apple CarPlay™ and a screen other than the MAP screen is being displayed, press |
|
To return to Mazda Connect screen |
Press and hold |
 .
. on the commander switch to display the MAP screen.
-
The voice recognition function of Mazda Connect cannot be used while Apple CarPlay™ is connected.
To End Apple CarPlay™
To end Apple CarPlay™, disconnect the Apple®-genuine connector cord from the USB terminal and disconnect the iPhone® from the connector cord.
If the connector cord is disconnected from the USB terminal during music playback using Apple CarPlay™, the audio source selection will no longer be available and the vehicle's audio device will be muted.
How to use Android Auto™ mode (Some Models)
What is Android Auto™?
Android Auto™ is an application which allows the operation of an Android™ Smartphone using the vehicle's audio. Android Auto™ functions such as the phone, messages, music, and map can be used with the vehicle's audio system.
-
YOU EXPRESSLY ACKNOWLEDGE AND AGREE THAT USE OF ANDROID AUTO™ (“THE APPLICATION”) IS AT YOUR SOLE RISK AND THAT THE ENTIRE RISK AS TO SATISFACTORY QUALITY, PERFORMANCE, ACCURACY AND EFFORT IS WITH YOU TO THE MAXIMUM EXTENT PERMITTED BY APPLICABLE LAW, AND THAT THE APPLICATION AND INFORMATION ON THE APPLICATION IS PROVIDED “AS IS” AND “AS AVAILABLE,” WITH ALL FAULTS AND WITHOUT WARRANTY OF ANY KIND, AND MAZDA HEREBY DISCLAIMS ALL WARRANTIES AND CONDITIONS WITH RESPECT TO THE APPLICATION AND INFORMATION ON THE APPLICATION, EITHER EXPRESS, IMPLIED OR STATUTORY, INCLUDING, BUT NOT LIMITED TO, THE IMPLIED WARRANTIES AND/OR CONDITIONS OF MERCHANTABILITY, SATISFACTORY QUALITY, FITNESS FOR A PARTICULAR PURPOSE, ACCURACY, QUIET ENJOYMENT, AND NONINFRINGEMENT OF THIRD PARTY RIGHTS. AS EXAMPLES, AND WITHOUT LIMITATION, MAZDA DISCLAIMS ANY WARRANTY REGARDING THE ACCURACY OF DATA PROVIDED BY THE APPLICATION, SUCH AS THE ACCURACY OF DIRECTIONS, ESTIMATED TRAVEL TIME, SPEED LIMITS, ROAD CONDITIONS, NEWS, WEATHER, TRAFFIC, OR OTHER CONTENT PROVIDED BY GOOGLE, ITS AFFILIATES, OR THIRD PARTY PROVIDERS; MAZDA DOES NOT GUARANTEE AGAINST LOSS OF APPLICATION DATA, WHICH MAY BE LOST AT ANY TIME; MAZDA DOES NOT GUARANTEE THAT THE APPLICATION OR ANY SERVICES PROVIDED THROUGH THEM WILL BE PROVIDED AT ALL TIMES OR THAT ANY OR ALL SERVICES WILL BE AVAILABLE AT ANY PARTICULAR TIME OR LOCATION. FOR EXAMPLE, SERVICES MAY BE SUSPENDED OR INTERRUPTED WITHOUT NOTICE FOR REPAIR, MAINTENANCE, SECURITY FIXES, UPDATES, ETC., SERVICES MAY BE UNAVAILABLE IN YOUR AREA OR LOCATION, ETC. IN ADDITION, YOU UNDERSTAND THAT CHANGES IN THIRD PARTY TECHNOLOGY OR GOVERNMENT REGULATION MAY RENDER THE SERVICES AND/OR APPLICATIONS OBSOLETE AND/OR UNUSABLE.
TO THE EXTENT NOT PROHIBITED BY LAW, IN NO EVENT SHALL MAZDA OR ITS AFFILIATES BE LIABLE FOR PERSONAL INJURY, OR ANY INCIDENTAL, SPECIAL, INDIRECT OR CONSEQUENTIAL DAMAGES WHATSOEVER, INCLUDING, WITHOUT LIMITATION, DAMAGES FOR LOSS OF PROFITS, CORRUPTION OR LOSS OF DATA, FAILURE TO TRANSMIT OR RECEIVE ANY DATA, BUSINESS INTERRUPTION OR ANY OTHER COMMERCIAL DAMAGES OR LOSSES, ARISING OUT OF OR RELATED TO THE APPLICATION OR YOUR USE OF OR INABILITY TO USE THE APPLICATION OR INFORMATION ON THE APPLICATION.
-
When using Android Auto™, please avoid distraction and use Android Auto™ responsibly. Stay fully aware of driving conditions and always obey applicable laws.
-
Android Auto™ is provided by Google and its use is subject to your agreement to the Android Auto™ terms of use.
-
When using Android Auto™, location, speed, and other vehicle data is transferred to your smart phone. For further details, refer to Google’s Privacy Policy.
How to use the Android Auto™ mode
Insert an Android™ Smartphone-genuine connector cord into the USB terminal indicated by the icon to connect the Smartphone.
Refer to How to connect USB port/Auxiliary jack (Search).
-
When an Android™ Smartphone connected to Bluetooth® is connected to the vehicle's USB terminal, Bluetooth® is used by Android Auto™ and the system switches to Android Auto™ mode.
-
If the Android™ Smartphone is connected to a USB terminal with no
icon indicated, the system operates in USB mode.
Display of Android Auto™ Mode Screen
Use any of the following methods to display the Android Auto™ mode screen in the center display.
-
Select
on the home screen, and select  from the Applications screen.
 -
Select
 on the home screen.
 -
Press and hold
on the commander switch.
Android Auto™ mode home screen

The media displayed on the Android Auto™ home screen may differ depending on the use conditions and version of the connected Android™ Smartphone.
|
No. |
Icon |
Explanation |
|---|---|---|
|
- |
Displays the use history of each application. The displayed contents differ depending on the application that has been started and its status. |
|
 |
Switches to the map application. |
|
 |
Switches to the call mode. |
 |
 |
Displays the Android Auto™ home screen. |
 |
 |
Switches to the Music application. |
 |
 |
Switches to the Mazda Connect home screen. |
Convenient ways to use Android Auto™ mode
|
Item |
Operation method |
|---|---|
|
Operation using voice recognition*1 |
Any of the following methods can be used to start the voice recognition mode and operate Android Auto™ by voice.
|
|
To display the NowPlaying screen |
When music is playing in Android Auto™ and a screen other than the NowPlaying screen is being displayed, press |
|
To display the MAP screen |
When using map route guidance in Android Auto™ or a screen other than the MAP screen is being displayed, press |
|
To return to the Mazda Connect screen |
Press and hold |
 icon on the Android Auto™ screen.
-
The voice recognition function of Mazda Connect cannot be used while Android Auto™ is connected.
To end Android Auto™
To end the Android Auto™ mode, disconnect the Android™-genuine connector cord from the USB terminal or disconnect the Android™ Smartphone from the connector cord.
If Android Auto™ cannot be connected
When the message, “Mobile Device Error”, is displayed and Android Auto™ cannot be connected.

Make sure that the Android™ Smartphone in question is compatible with Android Auto™.
Before trying to reconnect your Android™ Smartphone to the connector cord, do the Bluetooth® device pairing again.
If the Android Auto™ connection setting cannot be changed
Depending on your Android™ Smartphone, the connection setting may have been in charging mode only when the connector cord is connected.
In this case, switch off the Android Auto™ connection setting once, and then switch it back on while connected to USB mode.
The connection setting can be changed to the Android Auto™ connection in the  tab on the Settings screen (Search).
Device selection
If several devices have been paired, the Bluetooth® unit links the device last paired. If you would like to link a different paired device, it is necessary to change the link. The order of device priority after the link has been changed is maintained even when the ignition is switched off.
Connecting other devices
-
Select the
icon on the home screen to display the Settings screen. -
Select the
tab. -
Select
 .
. -
Turn the Bluetooth® setting on.
-
Select the name of the device you would like to connect.
-
 selection
Connects both devices as hands-free and Bluetooth® audio.
 selection
Connects as a hands-free device.
 selection
Connects as Bluetooth® audio.
The following functions can be used for the Hands-free or audio.
-
Hands-free: Phone calls and E-mail/SMS
-
Audio: Bluetooth® audio, Pandora®, Aha™, Stitcher™ radio
Disconnecting a device
-
Select the
icon on the home screen to display the Settings screen. -
Select the
tab. -
Select
. -
Turn the Bluetooth® setting on.
-
Select the device name which is currently connected.
-
Select
 .
.
What is Stitcher™ Radio?
Stitcher™*1 radio is an application which can be used to listen to Internet radio or stream podcasts.
Recommended content is automatically selected by registering content which you put into your favorites, or by pressing the Like or Dislike button.
For details on Stitcher™ Radio, refer to “http://stitcher.com/”.
-
Stitcher™, the Stitcher™ logo, and the Stitcher™ trade dress are trademarks or registered trademarks of Stitcher, Inc., used with permission.
-
To operate Stitcher™ Radio from your Bluetooth® device, perform the following in advance:
-
Install the Stitcher™ Radio application to your device.
-
Create a Stitcher™ Radio account for your device.
-
Log onto Stitcher™ Radio using your device.
-
-
If the Applications screen is not displayed on the device, Stitcher™ may not play on the center display.
